



How to list your products on Google Shopping for free
List your products on Google Shopping for free: pass Google's store checks, connect your store to Merchant Center with the free Google & YouTube app, write titles in the words shoppers type, fix every flagged issue the same day until each product is approved, and check views and clicks every Sunday.
ByDinesh BypillaReviewed byMurali SidLast checked 18 min read
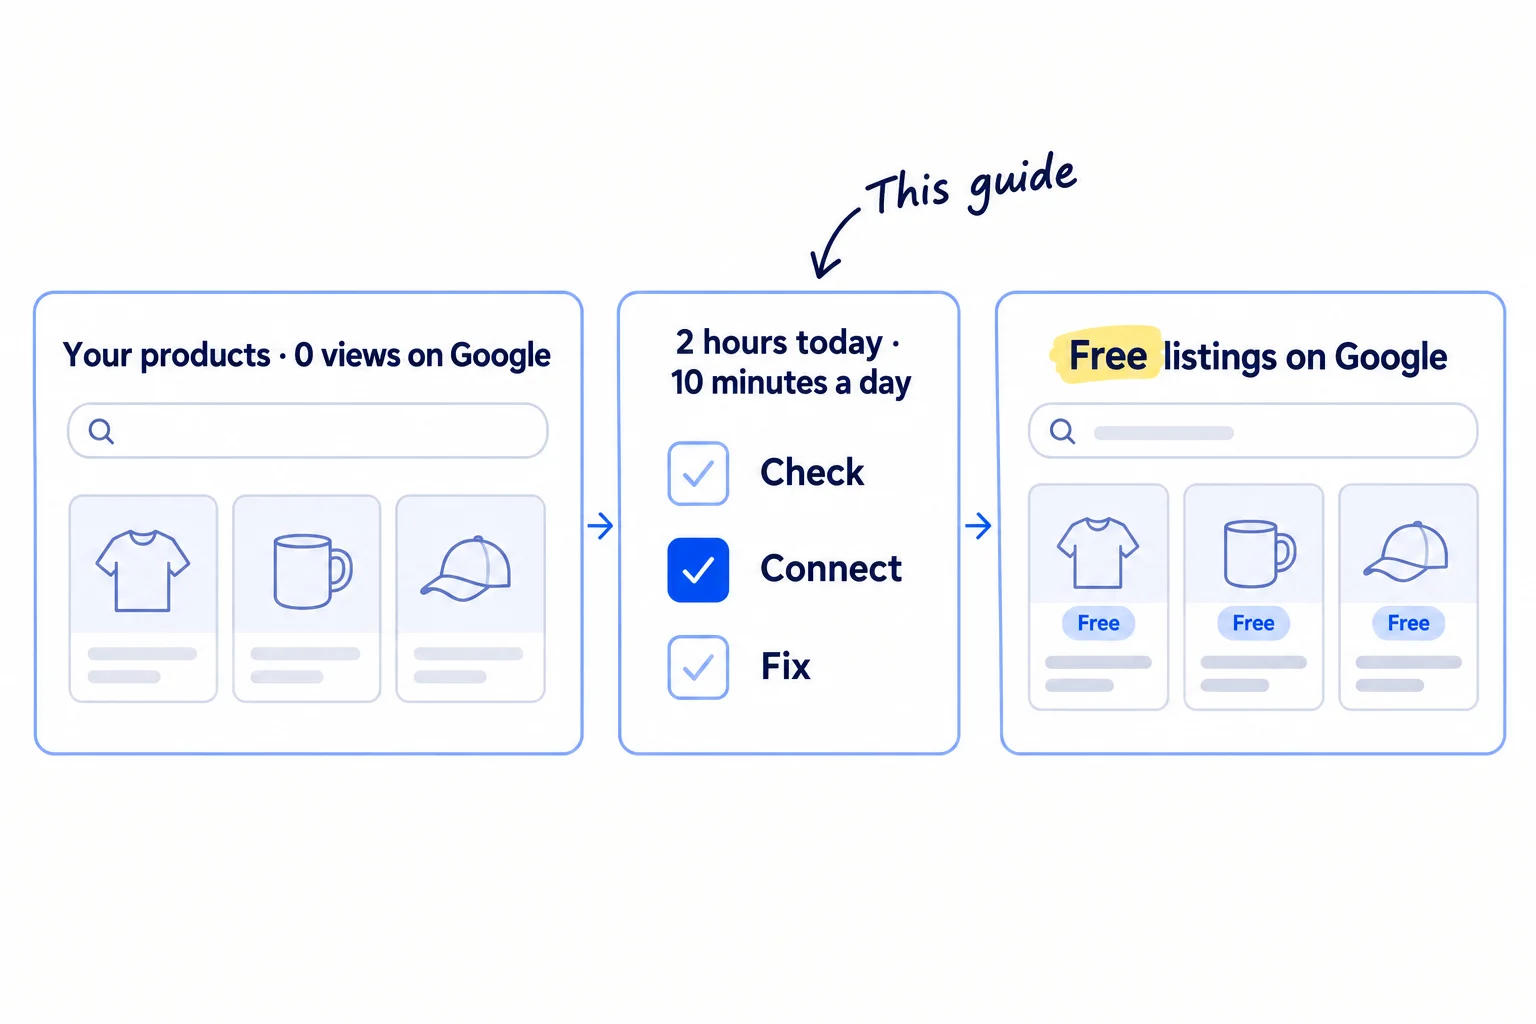
Your store is live, the few orders you have came from people you know, and you cannot afford ads yet. Here is how to list your products on Google Shopping for free: get your store past Google's checks, connect it to Google Merchant Center with the free Google & YouTube app, and fix every issue Google flags until each product is approved. It is one of the few ways to get traffic to a new store for free, yet many new stores install the app, see "Not approved" or a suspension over a missing refund page, and stop before a single product shows.
Do these three things
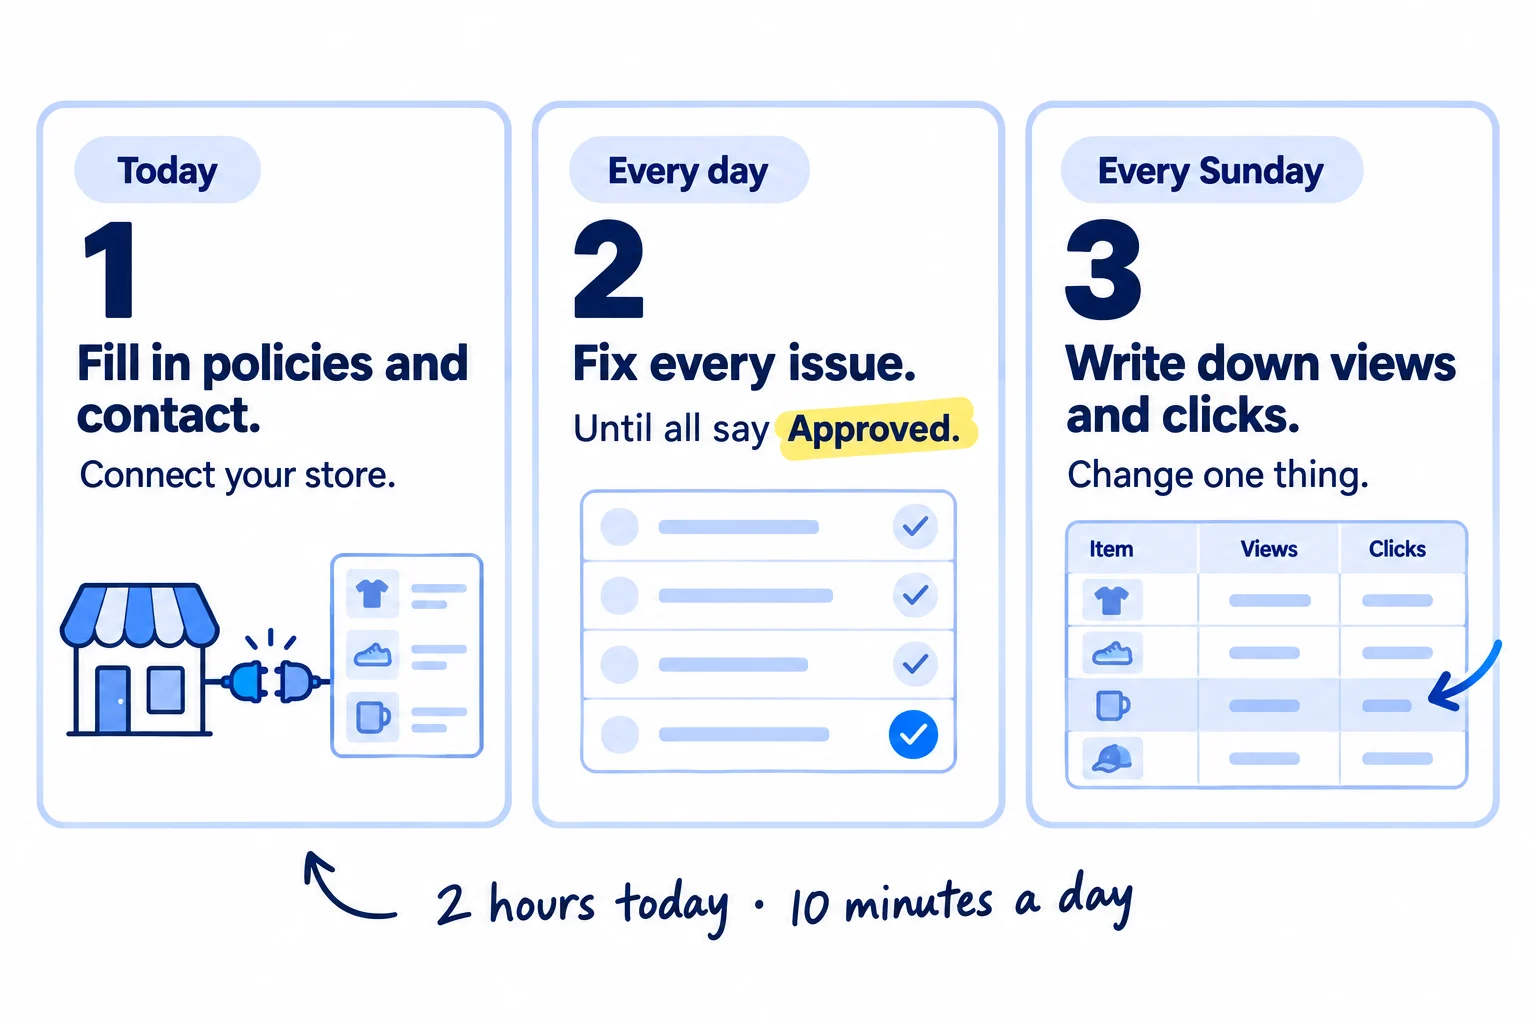
About 2 hours today, 10 minutes a day until Google approves your products (usually 3 to 5 business days), then 20 minutes every Sunday. Judge a title or photo after 1,000 views.
Show the three actions in fullHide the full list
- Today: fill in your refund policy, terms, contact page and shipping, then connect your store to Google Merchant Center with the free Google & YouTube app. Your products go to Google for review.
- Every day: open the app's Products tab and Merchant Center's "Needs attention" page, and fix every issue the same day, until every product says Approved. A product that is not approved does not show, and one marked Limited shows less.
- Every Sunday: in Merchant Center, open Analytics › Products with Traffic set to Organic. Write down views, clicks and orders for each product, and change one thing on the product with the most views and the lowest click rate.
Get help doing these
ChatGPT or Claude reads this guide and works through it with you.
1. Check your store meets the rules for Google free listings
Before you connect anything, make your store pass the checks Google runs on every new store: it is public, it takes payment, its refund policy and terms are in the footer, it has a contact page, and it ships to the country you sell in. Google checks your website, not just your product list, and a store that looks like it hides who runs it can be suspended.
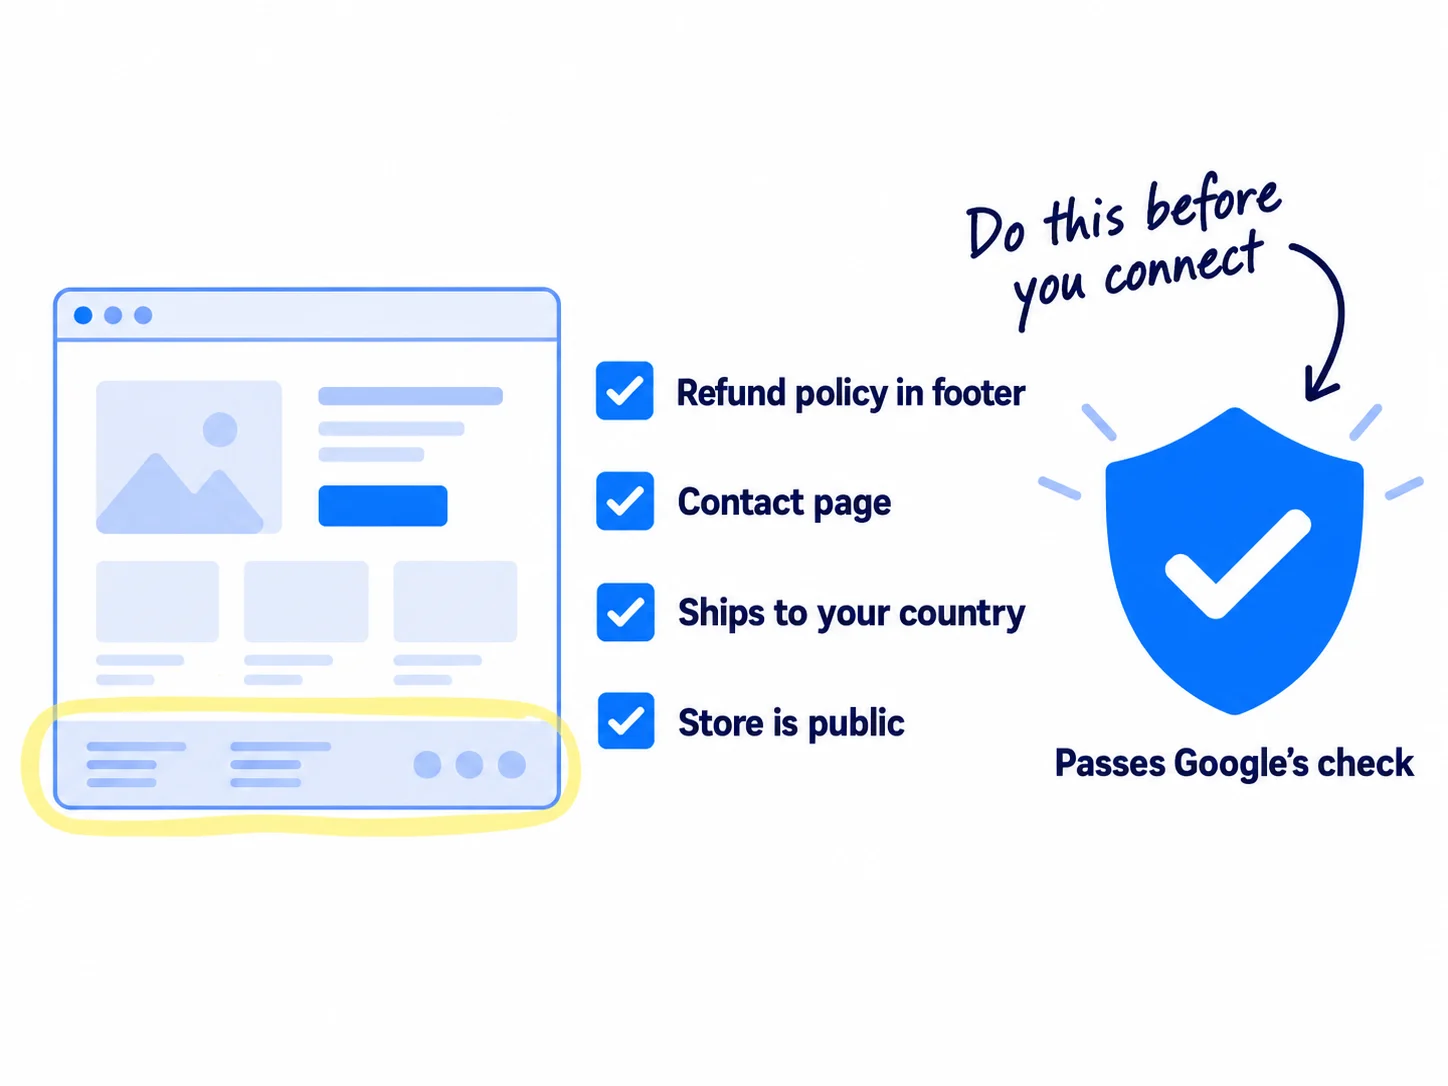
Google's Misrepresentation policy is the one new stores hit most. It covers stores that hide who runs them or leave out the full price or the return terms, and Google says serious cases are suspended "upon detection and without prior warning". Store owners on the Shopify Community reported these suspensions within days of connecting a new store through 2025 and 2026. A store that is plainly real, with a way to reach a person, avoids most of them. More on making a new store look trustworthy is in its own guide.
Work through this list in your Shopify admin:
- Public store. Turn off password protection. The app cannot connect to a store in private mode. If you have not yet placed a test order, do it now.
- Payment. A payment provider is set up under Settings › Payments.
- Policies. Under Settings › Policies, fill in the Refund policy and Terms of service, and add both to your footer menu. The refund policy says how many days a buyer has, who pays return postage, and what happens to opened items.
- Contact page. A page that shows an email address, a phone number and your business address. Use an email on your own domain, not a Gmail address: Merchant Center asks for your domain in its customer service email field.
- One name everywhere. The business name and address on your contact page are the ones you will type into Merchant Center. Google may ask for ID or business papers, and the names must match exactly.
- Shipping. A shipping zone for your country in your General shipping profile, with a price and a delivery time. The app can copy these rates into Merchant Center only from the General profile. Showing the delivery cost early also cuts abandoned carts.
- Product pages. Each one shows the price, whether it is in stock, a real photo and a description. The same technical checks for a new website help here too.
You can return [unopened / any] items within [number] days of delivery.
To start a return, email [name]@[yourdomain].com with your order number.
[We / You] pay the return postage. We refund you within [number] days of receiving the item.
[Items that cannot be returned once opened: list them.]
Questions about an order? Email [name]@[yourdomain].com or call [phone number]. We reply within [1 business day].
[Legal business name], [street address], [city], [postcode], [country]
Returns: [number] days from delivery. See our refund policy for how to send an item back.
- Tool: your Shopify admin. No paid tool needed.
- Time: about 1 hour, once.
- You will have: a public store with policies in the footer, a contact page and shipping rates for your country.
- It worked if: a friend who has never seen your store finds the refund policy and a way to contact you within 10 seconds, and later the app's setup checklist shows every item ticked.
- Common mistake: a Gmail address, no business address and a refund policy copied from a template that does not match what you actually do. Those are exactly what a Misrepresentation review looks for.
2. Write product titles in the words shoppers type
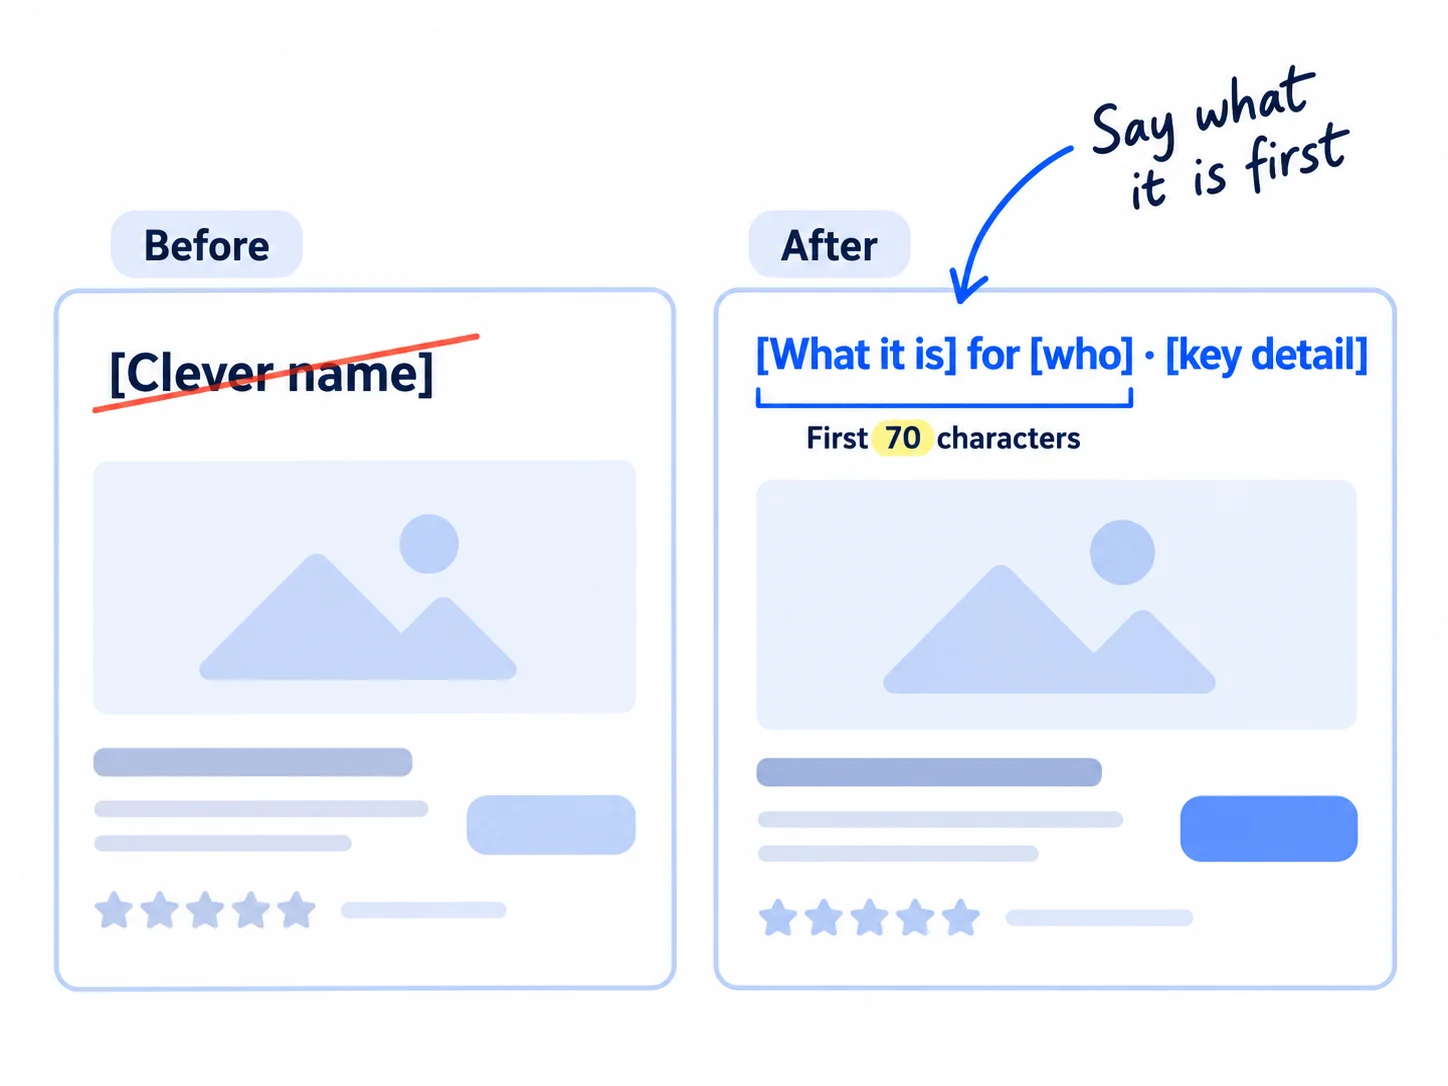
Google matches your free listing to a search mostly by its title, so start each title with what the product is and who it is for, in the words shoppers type. Do this before you connect, so Google reviews your best version first.
Collect the words first. Type your product type into Google and write down the suggestions, and note the words buyers use in reviews of competitors' products. Keep the phrases that name the product and the problem, the way you would when you find keywords for SEO. ChatGPT or Claude can turn your notes into a longer list of search phrases.
Then write each title yourself. Google's rules say a title written by AI must be sent in a separate field that marks it as AI-made. The simple way to stay inside the rule is to let AI list the phrases and type the title yourself. It takes about 5 minutes a product.
[What it is] for [who or what problem], [one key detail], [size, pack or colour] | [Your brand]
- Up to 150 characters. Shoppers usually see only the first 70, so what it is and who it is for go first.
- No price, "sale", "free shipping" or words in capitals for emphasis. Google disapproves titles with promotional text or all caps.
- Each variant, such as a colour or size, gets its detail in the title.
- If you want to keep a short brand name on your store, put the long title in the product's search engine listing title instead. In the app, go to Settings › Product feed › Additional settings to sync with Google Merchant Center, and pick "Search engine product titles". The same field matters for your Shopify SEO.
Fix the main photo at the same time. Show the product alone on a white or plain background, filling most of the frame, with no text, badges, logos or borders added. Upload the largest file you have, about 1,500 by 1,500 pixels. From 31 January 2027, Google requires at least 500 by 500 pixels for every product. Product Studio, a free tool inside the Google & YouTube app, can remove a background in one click. Keep photos of the product in use, and your short videos, as extra images on the page. Then rewrite the first two lines of each product description so they say what it is, what it is made of and how much is in it.
- Tool: Google search suggestions, your Shopify admin, and ChatGPT or Claude for the phrase list. All free.
- Time: about 10 minutes a product: 5 for the title, 5 for the photo.
- You will have: a title under 150 characters and a clean main photo for every product.
- It worked if: someone who reads only the first 70 characters of a title can tell you what it is and who it is for, and no main photo has anything written on it.
- Common mistake: keeping a brand-only name like "No. 2" or "The Soft One". Nobody types that, so the listing matches no search.
See it done: Ferns & Rinse's shampoo title
Ferns & Rinse is a made-up plant-based haircare brand with its own Shopify store. It sells one shampoo and one conditioner at $28 each, or both for $49.
Before
Fern Wash No. 1
After
Plant-Based Shampoo for Dry, Curly Hair | Ferns & Rinse
Why it works: The first words are what a shopper types, and the brand comes last because nobody searches for a brand they have never heard of.
3. Connect your store to Google Merchant Center with the Google and YouTube app
Install the free Google & YouTube app from the Shopify App Store. It creates your Google Merchant Center account, claims your store's domain and sends every product to Google for review. Google makes the app, and it is free to install; you pay only if you later choose to run ads.
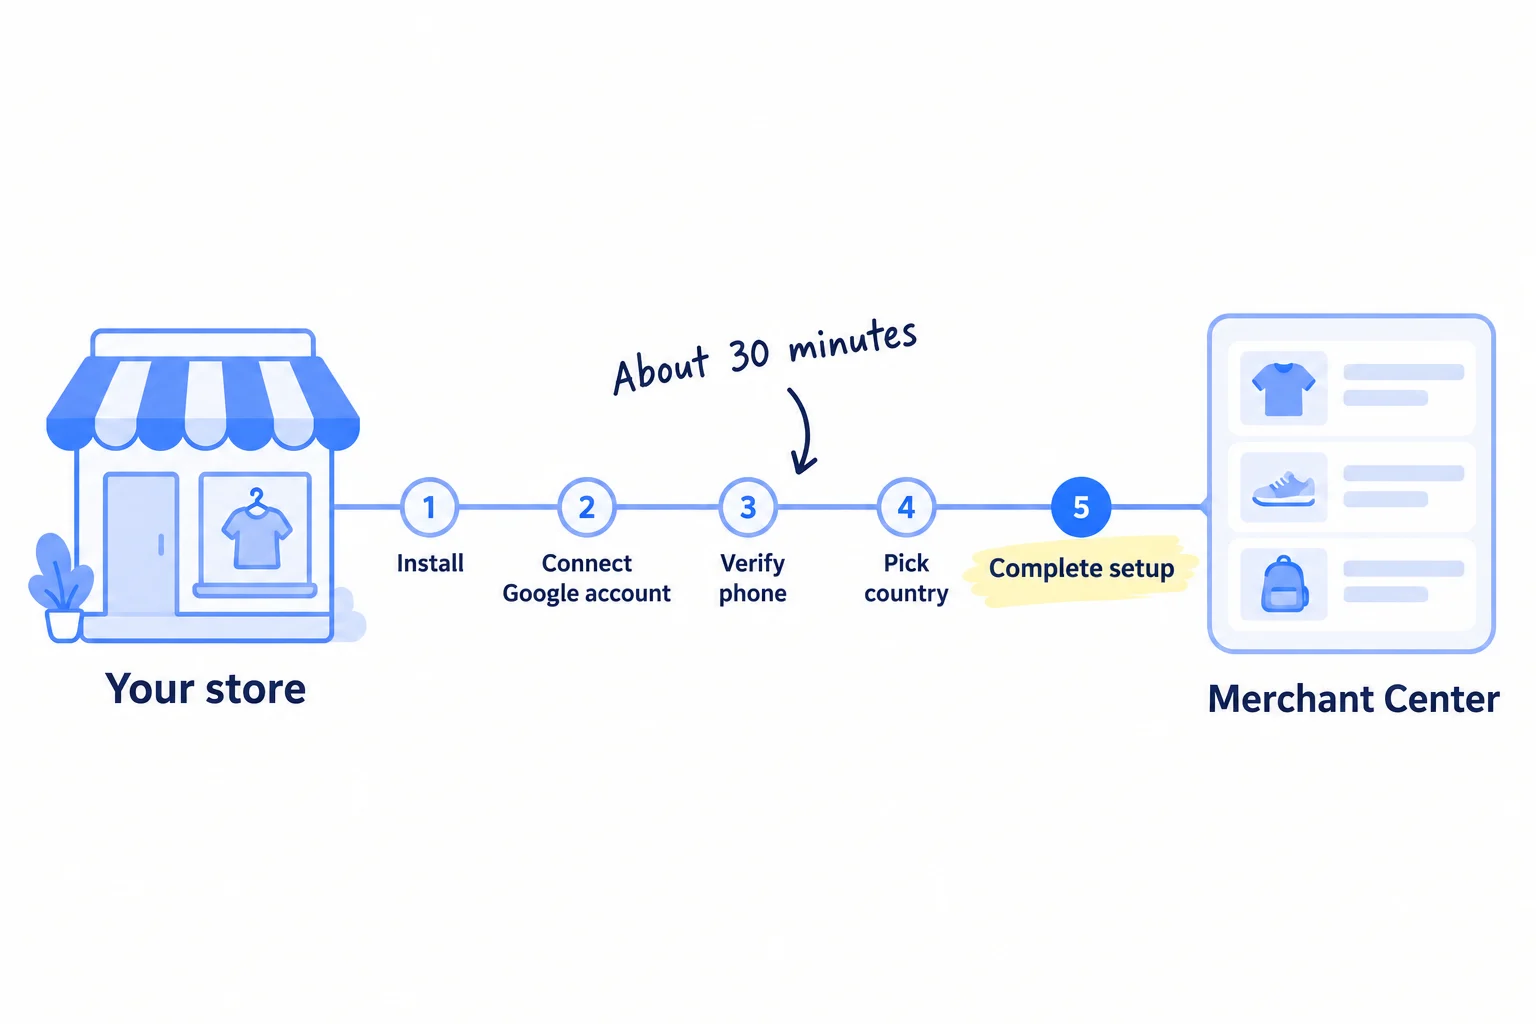
- In the Shopify App Store, search for "Google & YouTube", check the developer is Google LLC, and select Install.
- Select Connect Google Account. Use the Google account you will keep for the business: it becomes the admin of your Merchant Center account.
- If you have never had a Merchant Center account, select Create new. If you made one before, pick that one from the list instead of creating a second.
- Work through the store details checklist. Each item links to the page in your Shopify admin that fixes it. After step 1 of this guide, it should already be ticked.
- Verify it's you: enter the phone number from your contact page and type in the code Google sends.
- Pick your target country and language. Under shipping, choose to import your settings from your store. Choose your checkout link settings, agree to the terms and select Complete setup.
Your products then sync on their own. Every product available to your Online Store is sent to Google, and changes you make in Shopify follow automatically. Shopify says Google reviews new products within 3 to 5 business days. Google also shows the same product data in its other results, so the work you do here also feeds your products into Google's AI Overviews and Gemini, and into YouTube if you post videos there. Showing up in ChatGPT is a separate job, covered in getting your products recommended by ChatGPT.
Not on Shopify? You can create the account at Google Merchant Center directly, and Google can add products from your own product pages if they carry schema markup. Free listings need product pages on your own website. If you sell only on Etsy, Amazon or TikTok Shop, start with those guides, or first make a website for your business.
- Tool: the Google & YouTube app for Shopify, free to install.
- Time: about 30 minutes, once.
- You will have: a Merchant Center account linked to your store, with your products sent for review.
- It worked if: the app's Products tab lists every product as Under review, Approved, Limited or Not approved. Under review and Approved are what you want; the other two go to step 4 and step 5.
- Common mistake: sending the same products to Google twice, for example through a feed app and the Google & YouTube app. Use one source. If you already had a feed in Merchant Center, the app replaces it when you connect.
4. Add brand, MPN, category and your return policy
Google needs four things your product pages do not hold: a brand, a product number when there is no barcode, a Google category, and your return rules in its own settings. Add them in one sitting in the app's bulk editor and in Merchant Center.
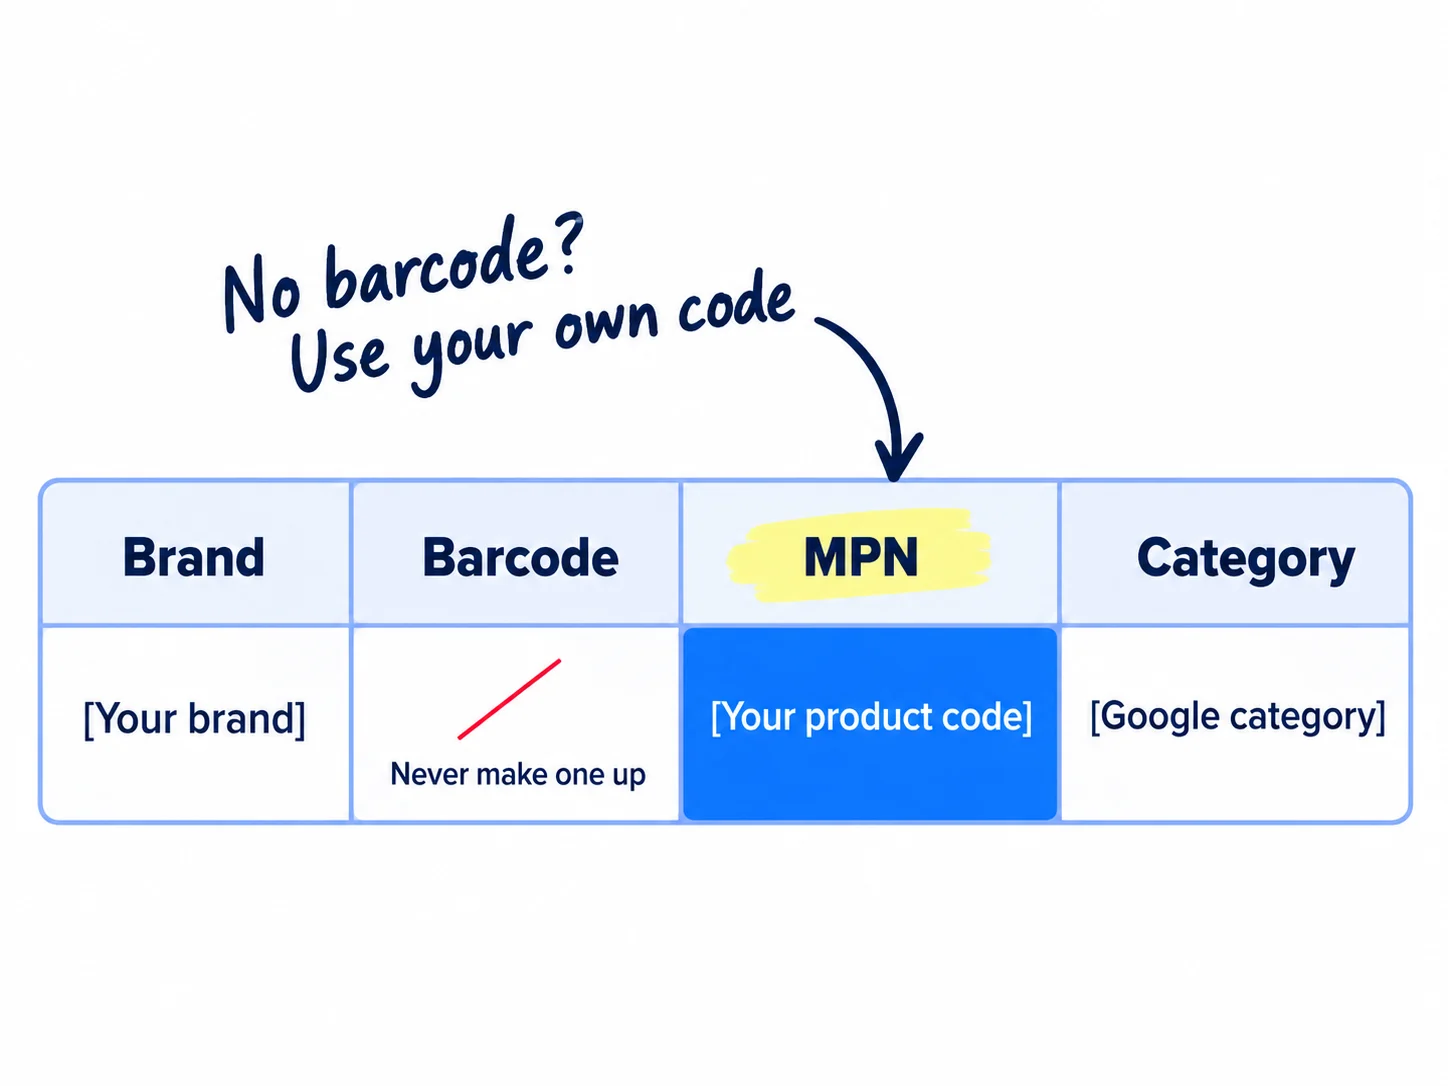
In the app. Go to Sales channels › Google & YouTube › Products › All products, select every product and choose Edit in bulk editor. For each one:
- Brand: your brand name.
- Barcode (GTIN): only if you bought real barcodes for your products. Then put each one in the variant's Barcode field in Shopify. Most new brands have none, and that is fine: Google says a product only you sell, or a store brand, generally has no GTIN. Never make one up.
- MPN: if there is no barcode, enter your own product code (your SKU) as the MPN. If a product is handmade or made to order, tick This is a custom product instead.
- Google product category: pick the most specific one that fits.
- Product type: your own category path with at least 3 levels, such as "Hair care > Shampoo > Curly hair". Google's help asks for this.
A set of your products sold at one price needs a title and main photo that show everything in it, so shoppers can see what they get.
In Merchant Center. Open Products & store › Shipping and returns › Return policies › Add return policy. Paste the link to your refund policy, pick your country, and give the same window, fees and return method as your website. If some items cannot come back once opened, which Google says is common for personal care items, add an exception policy for them. Then open Settings › Business info and check the business name, address, phone and domain email match your contact page word for word. Google can show your return terms next to your listing, where they help a shopper decide, and a mismatch is one more thing a review can flag.
- Tool: the Google & YouTube app's bulk editor and Google Merchant Center. Both free.
- Time: about 30 minutes for a store with up to 20 products.
- You will have: brand, MPN or custom product, category and product type on every product, and a return policy and business details in Merchant Center.
- It worked if: no product shows "Missing GTIN or MPN", and the Return policies tab lists your policy for your country.
- Common mistake: typing a made-up or copied barcode to clear the error. A wrong GTIN hurts matching and can get products disapproved; an honest MPN does not.
See it done: Ferns & Rinse's product data
Bulk editor, all three products
| Title | Brand | GTIN | MPN | Google product category (last levels) | Product type |
|---|---|---|---|---|---|
| Plant-Based Shampoo for Dry, Curly Hair | Ferns & Rinse | Ferns & Rinse | none | FR-SH-01 | Hair Care > Shampoo & Conditioner > Shampoo | Hair care > Shampoo > Curly hair |
| Plant-Based Conditioner for Dry, Curly Hair | Ferns & Rinse | Ferns & Rinse | none | FR-CO-01 | Hair Care > Shampoo & Conditioner > Conditioners | Hair care > Conditioner > Curly hair |
| Plant-Based Shampoo and Conditioner Set for Curly Hair | Ferns & Rinse | Ferns & Rinse | none | FR-SET-01 | Hair Care > Shampoo & Conditioner > Shampoo & Conditioner Sets | Hair care > Sets > Curly hair |
Why it works: No barcodes, so each product gets the brand and its own code, and the set's title says both products are in it.
5. Check free listings are on and fix every product issue the same day
Free listings are on by default for most new accounts, but check it once, then open your product issues every day and fix each one the same day, until every product says Approved. A product that is not approved does not show, and one marked Limited shows less.
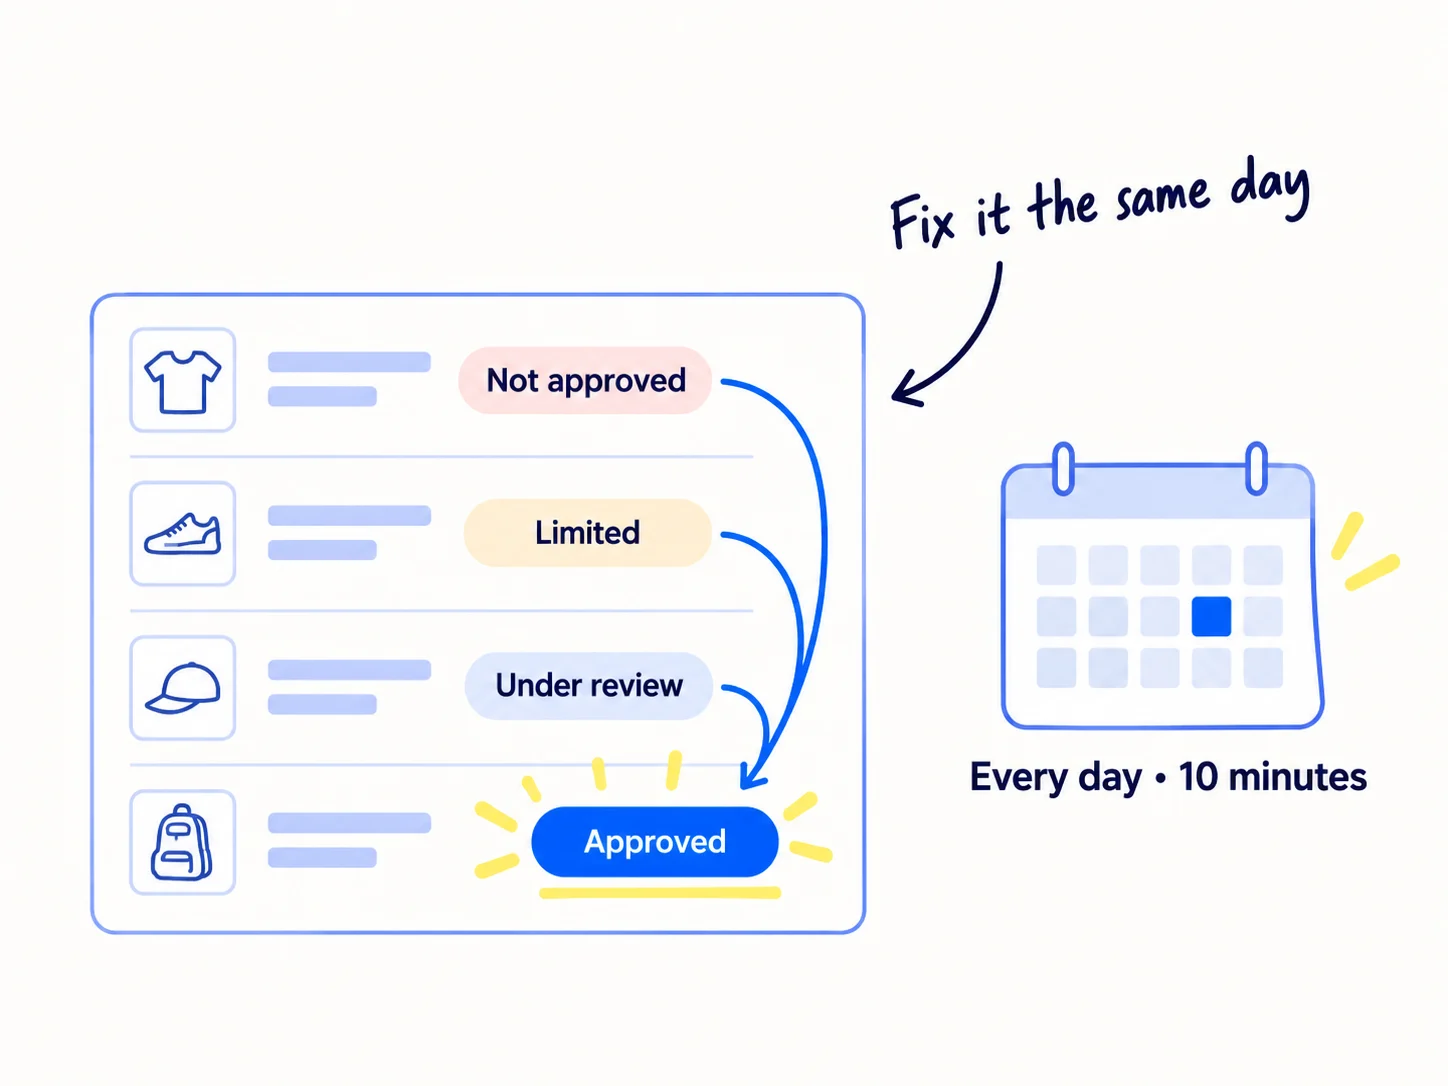
Check once. In Merchant Center, open Marketing › Marketing methods and look at the "Free listings" card. If it is off, turn it on; you need admin access to change it.
Every day, until all are approved. Open the app's Products tab and read each status: Not approved, Limited, Under review or Approved. Then open Products › Needs attention in Merchant Center and select View fix on each issue. The ones new stores see most, and the fix for each:
| Issue | Fix |
|---|---|
| Missing description | Add a description to the product in Shopify and save. |
| Missing image | Add at least one photo to the product in Shopify. |
| Unavailable landing page | Tick both Online Store and Google & YouTube under the product's sales channels. |
| Missing GTIN or MPN | Add the barcode, or the brand and MPN (step 4). |
| Promotional overlay on image | Replace the photo with one that has no text or badges, or turn on automatic image improvements under Products › Automations. |
| Excessive capitalization | Rewrite the title in normal case (step 2). |
When you change a product, Google checks it again on its own. Ask for a review only when you have fixed an issue and still think Google is wrong, and do it once per issue. If your whole account gets a warning, Google usually gives 7 or 28 days to fix it. If it is suspended for Misrepresentation, fix the store first (step 1), then appeal once and say what you changed. Do not open a second account.
After all are approved. Keep the daily look, about 2 minutes. Any change you make in Shopify can create a new issue, and the app keeps your products fresh in Google only while it stays installed and connected.
- Tool: Google Merchant Center and the app's Products tab.
- Time: about 10 minutes a day until everything is approved, then 2 minutes a day.
- You will have: every product approved, and free listings switched on.
- It worked if: every product says Approved within 5 business days of connecting, and Analytics › Products shows your first views within 14 days after that.
- Common mistake: rewriting titles every day while the first review is still running. Each change starts the check again. Make your changes in step 2, then leave approved products alone for a week.
6. Check your free listing clicks every Sunday and fix the weakest product
Every Sunday, open Analytics › Products in Merchant Center, set the Traffic filter to Organic, and write down how many times each product was shown and clicked. Merchant Center counts free listings as organic traffic, so this is where your free Google Shopping results show up.
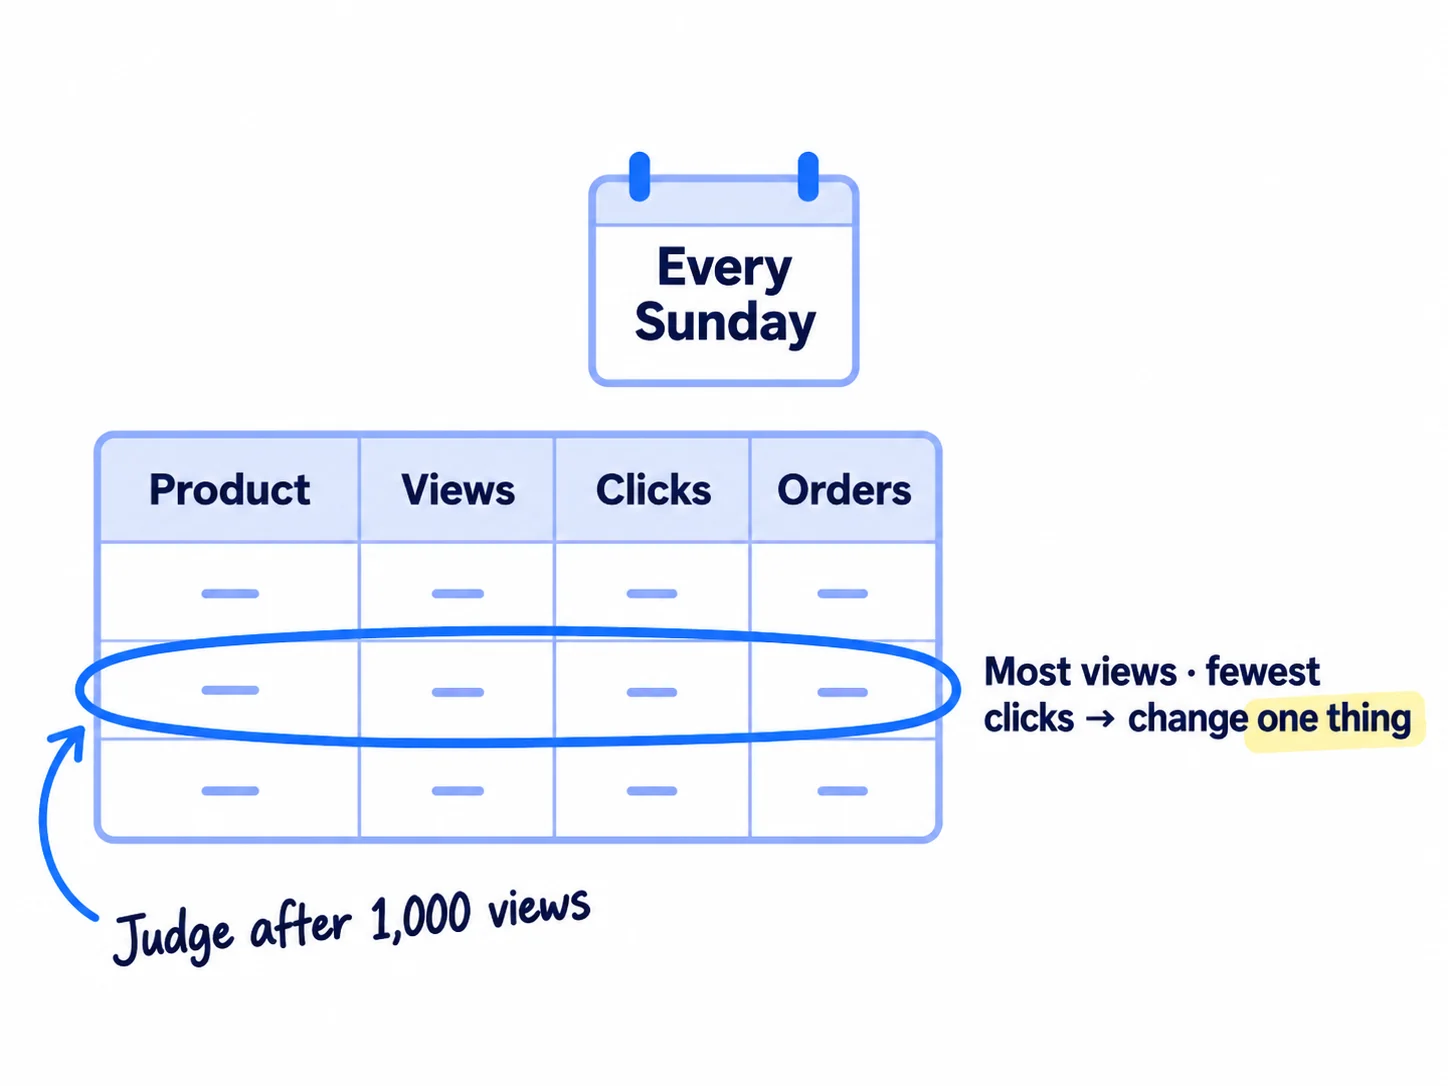
Merchant Center shows views (it calls them impressions), clicks and the click rate for each product. It can also show purchases, but only once purchase tracking is set up, so for now count orders yourself: email every new buyer and ask "How did you first hear about us?" This is self-reported attribution, and at your size it is the most reliable count you have. If your store also uses conversion tracking, Google Analytics labels this traffic "Shopping free listings".
Week | Product | Views | Clicks | Click rate | Orders from Google | What I changed
Then use these rules:
- After a product has 1,000 views, find the one with the most views and the lowest click rate. Change one thing on it: the main photo first, then the first 70 characters of the title. Wait for the next 1,000 views before you change it again. Fewer than 1,000 views tells you nothing.
- 0 views 14 days after approval: check the title starts with the words shoppers type (step 2) and that nothing is waiting in Needs attention. Google says it can take time before a new seller's products appear, so keep going.
- More than 100 clicks and no orders: the listing works and the product page does not. Work through fixing a store with traffic but no sales, and ask 5 buyers what nearly stopped them. If the offer itself is the problem, why no one is buying covers it.
Free listings bring shoppers who are already searching, but they do not replace the daily work in getting your first sales on Shopify: 100 personal messages and 2 short videos a day. Keep doing both, as part of your D2C marketing routine. Free listings are one more channel to count next to the others, and once a month their numbers go into your marketing review.
Leave paid Shopping ads off for now. The rule from the first-sales guide still holds: no paid ads until you have 10 reviews and 1 order per 100 visits from strangers. When you get there, work out your break-even ROAS and read Google Shopping vs Performance Max for a small store. Star ratings on your listings come later too: Google's product ratings need at least 50 product reviews.
- Tool: Google Merchant Center and a Google Sheet.
- Time: about 20 minutes every Sunday.
- You will have: one row per product every week, and one change logged whenever a product passes 1,000 views.
- It worked if: every product has a row each Sunday, and your first free listing clicks show within a month of approval.
- Common mistake: judging a title after 50 views, or paying for Shopping ads to "test" before free listings have brought a single click.
See it done: Ferns & Rinse's first Sunday rows
Free listings, weeks 1 and 2 after approval
| Week | Product | Views | Clicks | Click rate | Orders from Google | What they changed |
|---|---|---|---|---|---|---|
| 1 | Shampoo | 180 | 3 | 1.7% | 0 | nothing yet |
| 1 | Conditioner | 240 | 1 | 0.4% | 0 | nothing yet |
| 1 | Set | 60 | 1 | 1.7% | 0 | nothing yet |
| 2 | Shampoo | 410 | 7 | 1.7% | 1 | nothing yet |
| 2 | Conditioner | 620 | 2 | 0.3% | 0 | nothing yet |
| 2 | Set | 150 | 2 | 1.3% | 0 | nothing yet |
Why it works: The conditioner is seen most and clicked least, so they change only its main photo and wait for the next 1,000 views.
Where Scout7 helps
Scout7 speeds up step 2. Steps 1, 3, 4, 5 and 6 are yours.
Step 2. Scout7's keyword intelligence researches the words buyers search for and shows the monthly searches, difficulty and trend for each, with who leads for it on Google and in AI answers. Use it to choose the words at the front of each product title. You still write each title yourself and check it against Google's rules.
Your Google free listings checklist for the next 2 weeks
0 of 11 done
Work through this list with an AI assistant
It drafts the work and keeps track of what is done.
Frequently asked questions
- Is Google Shopping free?
Free listings are free. Google shows eligible products at no cost in Search, the Shopping tab, Images, Lens, YouTube, Maps and Gemini, and you pay nothing per click. Google Merchant Center and the Google & YouTube app for Shopify are free too. Only Shopping ads cost money, per click, and you can leave them off. Set your ad budget later.
- How long until my products show on Google Shopping?
Shopify says Google reviews new products within 3 to 5 business days after they sync. After approval, first views often come within days, but Google says a new seller can take longer. Most new stores should see their first free listing clicks within a month. If there are still 0 views 14 days after approval, recheck your titles and the Needs attention page.
- Why are my products approved but getting no views?
Approval means a product is allowed to show, not that it will. Google shows the listing whose title and details best match the search. Start each title with what the product is and who it is for, fill in brand, category and product type, and use a clean photo. A new store with few reviews also gets fewer views at first; how long SEO takes explains why.
- Do I need barcodes (GTINs) to list products on Google?
No. Google says a product only you sell, or a store brand, generally has no GTIN, and you should not submit one. Give each product your brand and your own product code as the MPN, or tick "This is a custom product" for handmade items. Never type a made-up barcode. Buy real barcodes only if you also plan to sell through a retailer or marketplace that requires them.
- Is Google Merchant Center worth it for a small store?
Yes, if you sell from your own website. It is free, the setup takes about 2 hours, and it puts your products in front of people already searching for them. Expect small numbers at first and count them every Sunday. Merchant Center shows visits, not whether Google has indexed your site; for that, use Google Search Console.
Sources
- 1.Free listings for products — Google Merchant Center Help, checked 30 September 2026
- 2.Merchant Center Next is now Merchant Center — Google Merchant Center Help, July 2026, checked 30 September 2026
- 3.Install and link the Google & YouTube app on Shopify — Google Merchant Center Help, checked 30 September 2026
- 4.Syncing your products (Google & YouTube app on Shopify) — Google Merchant Center Help, checked 30 September 2026
- 5.Show your products for free on Google — Google Merchant Center Help, checked 30 September 2026
- 6.Google & YouTube — Shopify App Store, checked 30 September 2026
- 7.Google & YouTube channel requirements — Shopify Help Center, checked 30 September 2026
- 8.Syncing your products — Shopify Help Center, checked 30 September 2026
- 9.Misrepresentation — Google Merchant Center Help, checked 30 September 2026
- 10.Google Merchant Center suspensions for new Shopify stores — Shopify Community, 30 October 2025, checked 30 September 2026
- 11.Add your business information — Google Merchant Center Help, checked 30 September 2026
- 12.Verify your business documents in Merchant Center — Google Merchant Center Help, checked 30 September 2026
- 13.Title [title] and structured title [structured_title] — Google Merchant Center Help, checked 30 September 2026
- 14.Image link [image_link] — Google Merchant Center Help, checked 30 September 2026
- 15.About Product Studio for Shopify — Google Merchant Center Help, checked 30 September 2026
- 16.Allow Merchant Center to improve your product images — Google Merchant Center Help, checked 30 September 2026
- 17.GTIN [gtin] — Google Merchant Center Help, checked 30 September 2026
- 18.Set up your return policies for Shopping ads and free listings — Google Merchant Center Help, checked 30 September 2026
- 19.Add products automatically from your online store — Google Merchant Center Help, checked 30 September 2026
- 20.Track your product performance in Merchant Center — Google Merchant Center Help, checked 30 September 2026
- 21.Track your product performance — Google Merchant Center Help, checked 30 September 2026
- 22.Upload a product reviews data source to Merchant Center — Google Merchant Center Help, checked 30 September 2026
Next article to read
Related guides
- How to do SEO for a Shopify storeD2CDo SEO for your Shopify store with a few products and no budget: check Google can see your store, give every product and collection page one phrase shoppers type, publish 1 buying-question page a day on your Shopify blog, ask 20 sites a day for a link, and check Search Console every Sunday.
- How to get your products recommended by ChatGPTD2CGet your products recommended by ChatGPT: check your Shopify store is in ChatGPT's shopping results, ask ChatGPT 20 questions your shoppers ask, rewrite your product pages with the facts it looks for, and get onto the pages it reads with 100 messages and 20 answers a day.
- How to launch a product on AmazonD2CLaunch a product on Amazon as a small brand: check shoppers search for it and a quarter of the price is left after Amazon's fees, set up Brand Registry, Vine and Request a Review, send 100 personal messages a day with Amazon Attribution links, post 2 videos and answer 20 questions a day, and start $10-a-day ads only after 5 reviews.
- How to calculate break-even ROASD2CComing soon
Guides that link here
- How to do SEO for a Shopify storeD2C
- How to get your products recommended by ChatGPTD2C
- How to add llms.txt and schema markup
- How to show up in Google AI Overviews
- How to use AI for content creation
- How to get customers online for free
- How to get traffic to a new website for free
- How to get your first sales on ShopifyD2C
- How to launch a D2C brandD2C
- How much to spend on marketing as an ecommerce brandD2C
- How to choose marketing channels for an ecommerce brandD2C
- How to market a D2C brandD2C
- How to price a productD2C
- How to find keywords for SEO
- How to get your website indexed on Google
- How to make an article rank higher on Google
- How to rank on Google Maps
- How to set up a Google Business Profile
- How to use Google Search Console
- Technical SEO checklist for a new website
Cite this page
Dinesh Bypilla (2026). How to list your products on Google Shopping for free. Scout7 Academy. https://scout7.ai/academy/seo/how-to-list-your-products-on-google-shopping-for-free
Written by Dinesh Bypilla, Agentic systems engineer at Scout7. Reviewed by Murali Sid. Last checked 30 September 2026.
Quote any part of this guide with a link back to this page. © 2026 Scout7.
Markdown version of this page: https://scout7.ai/academy/seo/how-to-list-your-products-on-google-shopping-for-free.md